Complete Google Gemini Training: AI Tools & Strategies
In the rapidly evolving landscape of artificial intelligence, Google Gemini has emerged as one of the most powerful and versatile AI platforms available. This comprehensive guide takes you deep into Gemini’s extensive ecosystem, revealing advanced features and practical strategies to maximize your productivity and creativity.
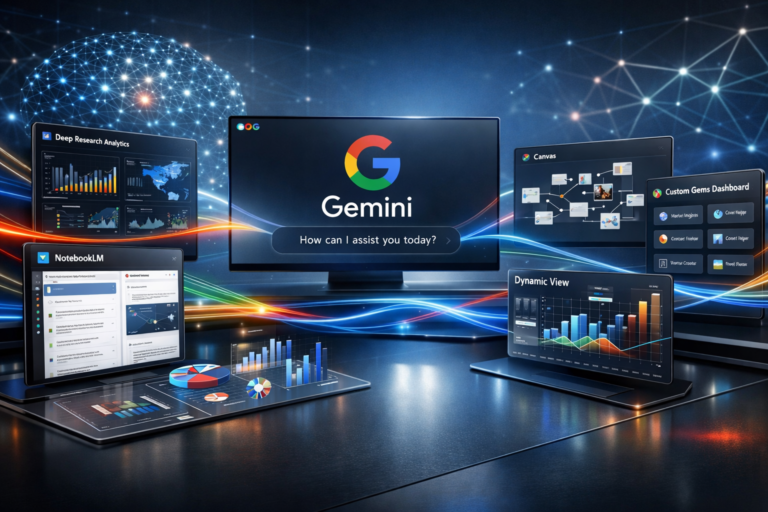
From Deep Research capabilities that analyze multiple sources simultaneously to NotebookLM integration that transforms how you organize and access information, Gemini offers a suite of tools designed for modern professionals. This training series equips you with hands-on skills to leverage cutting-edge features including Canvas applications for document manipulation, custom Gems for automated workflows, and Dynamic View for creating interactive experiences.
You’ll discover how to use thinking modes to understand AI reasoning processes, generate professional videos with VEO, create stunning visuals with Imagen 3, and implement guided learning experiences tailored to your needs. Learn to build shareable AI applications, schedule automated actions, and develop custom Gems that streamline repetitive tasks.
Whether you’re a content creator, educator, business professional, or simply an AI enthusiast, mastering these Gemini tools will transform how you work, learn, and create. Each lesson provides practical techniques you can implement immediately to harness the full potential of Google’s most advanced AI platform and stay ahead in our AI-driven world.
Welcome! As you work with Gemini, you’ll discover that certain modes allow you to view the reasoning process behind its responses when you submit a prompt. This visibility depends on which mode you select—thinking mode reveals this process, while fast mode does not.
To illustrate, let’s say you enter a prompt in fast mode. After clicking submit, Gemini will quickly deliver an answer. But sometimes you’ll want to understand the reasoning that led to that response. In those situations, you would start a new chat session, paste the identical prompt, and this time select thinking mode instead.
After submitting in thinking mode, you’ll notice the answer appears, but now there’s a dropdown arrow you can click. This reveals Gemini’s chain of thought—the step-by-step reasoning it used to arrive at its conclusion. While you’ll typically receive the same answer in both modes, fast mode won’t provide access to this reasoning process.
There’s also pro mode to consider. If you paste the same prompt and submit it in pro mode, Gemini will again display a dropdown arrow. When you expand this section, you’ll see a similar thought process as in thinking mode, though it might take a bit more time to generate.
In summary, if you want to see the logic behind Gemini’s answers, use thinking mode. That’s all for now—see you in the next video!
Welcome back. Gemini’s Deep Research feature enables you to dig deeper than surface-level information by drawing from multiple sources. You have the flexibility to incorporate data from various places: your personal files, web searches, Gmail, Google Drive, chat history, and Google Meet. You can deselect any of these options and rely solely on web search for your Deep Research if you prefer.
Additionally, you can enhance Deep Research by uploading documents directly from your computer in the designated upload area. After entering your question, you’ll select your preferred mode and press Enter. When using Deep Research, Gemini typically responds by presenting a research plan that outlines its approach to answering your query.
You can review this plan carefully. If modifications are needed, there’s an edit option available. For this demonstration, we’ll accept the plan as is and proceed by clicking Start Research. Gemini will then begin conducting the Deep Research process, and you’ll have the option to view either its reasoning process or the sources it’s examining.
As the research progresses, Gemini displays status updates. The left sidebar shows how many websites are being analyzed to compile your answer. In this case, the complete report was generated in approximately six minutes. Once finished, you’ll have several options available, which we’ll explore in the upcoming video.
That’s it for now—see you next time!
Welcome back. After your report is generated, you can navigate through it using the table of contents feature. This allows you to jump directly to particular sections you’re interested in. Another useful option is exporting your report to Google Docs, which stores it in Google Drive and makes it compatible with tools like NotebookLM.
Alternatively, you can simply copy the report and paste it into any word processing application you prefer. You’ll notice a Create button that offers exciting possibilities—it lets you build applications based on your report content. For instance, you can generate a browser-based webpage or an infographic that runs in your browser (though note that the infographic cannot be downloaded). You can also create a quiz derived from your report or produce flashcards for study purposes.
There’s an option to generate an audio overview summary in a dedicated section. Additionally, you can describe a custom application you’d like to create in your browser, tailored to your specific needs. As an example, when we entered a request in the app section for an audio overview with particular specifications, Gemini’s AI built a customized app according to that description.
It’s important to note: if you simply want a standard audio overview, click the audio overview button directly. However, if you type a custom app description in the dialogue box, Gemini will create an application based on your written instructions. You’ll be able to preview the resulting app, and if you’re interested, you can also view the underlying code that powers it.
That wraps this up—see you in the next video!
Welcome back. At the time this video was created, Google Gemini provides the capability to import your NotebookLM notebooks directly into a chat session. When you navigate to the Add Files section, you’ll find an option that searches for NotebookLM notebooks linked to your current Google Gemini account. After selecting NotebookLM, a dialogue box will appear displaying all your available notebooks.
You have flexibility in your selection—choose a single notebook or select multiple notebooks as needed. Once you’ve made your selections, click Add Source. An important consideration when connecting a notebook to Gemini is ensuring all files in your source section have proper names, as Gemini relies on the metadata from your sources.
The Gemini chat interface can only access specific elements of your notebook. It won’t be able to view your chat content, but it can see notes you’ve created in the left sidebar. If you want to incorporate content from your studio (located in the right sidebar) into your Gemini chat, you’ll need to download that asset first to convert it into a source.
For notes within the studio, you can click the ellipsis menu and convert them into a distinct source. However, if you’re working with a report and access its ellipsis menu, you’ll discover that automatic conversion to a source isn’t available. In this case, you can export the content as a document and then import it into your notebook to make it accessible in the Gemini chat.
In essence, the Gemini chat accesses the metadata from all sources you have stored in this section. That’s all for now—see you in the next video!
Welcome back. There’s a crucial point to understand when connecting a NotebookLM notebook to Google Gemini: you’ll be utilizing both the notebook’s content and Gemini’s underlying knowledge. If your goal is to work exclusively with the sources contained in your notebook, you should perform that work directly within NotebookLM. However, if you want to combine NotebookLM assets with Gemini’s broader knowledge base, then using the Gemini chat interface alongside NotebookLM makes sense.
It’s also important to recognize that NotebookLM notebooks operate in isolation. The materials and insights within individual notebooks remain separate—they don’t communicate with or influence other notebooks. Each notebook functions independently with its own enclosed knowledge base. Therefore, if you need to draw from information in two or more notebooks simultaneously, you’ll need to attach all relevant notebooks to your Gemini conversation. Within your prompts, you must be explicit about instructing the system to use only Gemini’s knowledge (and web search if desired), along with the precise information you need from each notebook and your intended outcome.
Your prompt structure should be something along these lines: You’ll want to ensure you’re restricting the AI in the Gemini chat to examine only the source material you’re providing. You can adapt this exact prompt template to suit your particular requirements, and you can even use your preferred AI tool to help refine what your prompt should say. This prompt framework is specifically designed to help you leverage particular elements when uploading multiple notebooks to your Gemini chat session.
That’s it for now—see you in the next video!
Welcome back. The video generation feature within Gemini chat has been updated, and you can generally produce between three and five videos daily using your Gemini account. To demonstrate, let’s say we enter a particular prompt and select the fast option. You’ll observe that Gemini begins creating a video. Since this isn’t an instantaneous process, we’ll let Gemini finish its work.
We’ll pause here and resume once the video creation is complete. You’ll see an eight-second clip, which we’ll play for you. “The core of the theory of constraints lies in these five steps: Identify, exploit, subordinate, elevate and repeat the process.” Next, we’ll switch to the Pro option.
We’ll use the identical prompt again. You’ll notice there are usage restrictions on how frequently you can access the Pro engine within Gemini chat. If you have an account, you can produce additional video clips like these using Google Flow, Google Whisk, and Google Vids, depending on your available credits. Let’s proceed by clicking Enter.
We’ll now generate a video using the Pro version, and our Pro video is ready. “So let’s look at the five focusing steps. First, identify the constraint, then exploit it.” Finally, we’ll also test thinking mode. We’ll input the prompt and click Enter. This will be our final video for the day, and here’s the result.
“We begin by identifying the constraint, then exploiting it. After that, we subordinate everything else.” As you can see, you have the ability to create videos using all three modes within the chat in this section. That’s all for now—see you in the next video!
Welcome back. There’s a key difference to understand when working with Dynamic View, which enables you to generate interactive images within your Google Gemini account. When you create a Dynamic View image by entering text into the dialogue box, the resulting element appears more like an application than a traditional image.
Simply enter your prompt and select whichever mode you prefer, then click Enter. You’ll need to wait while Google Gemini generates the Dynamic View image. Keep in mind that creating the image app requires some time. You have the option to observe the reasoning process by clicking the dropdown arrow, or you can simply let the app generate in the background. Once the app is finished, you’ll notice the ability to share the conversation.
By clicking Share Conversation, you can distribute this conversation to other accounts, allowing another person to interact with the Dynamic View you created in the same way you do. However, the experience may vary somewhat when you incorporate uploaded files. For instance, if you navigate to this section, select Dynamic View, and then attach a file to guide the creation process while entering a similar or identical prompt (keeping the Pro version selected), you’ll let Gemini generate this Dynamic View image again.
You can monitor the creation process and view the AI’s reasoning here, or simply wait for the image to complete. As of this video’s recording date, you can also share conversations that include uploaded files. Before this video was recorded, uploading files with Dynamic View meant you couldn’t reliably share those conversations. Now, however, there are instances where using assets in Dynamic View creation allows you to share that conversation with others so they can experience the app you built in Google Gemini.
That’s all for now—see you in the next video!
Welcome back. Canvas is a tool whose practical applications aren’t immediately apparent. However, Canvas allows you to work with and transform files and their formats. For instance, let’s say you have a document stored in your drive. You can import that file into Gemini, and with Canvas enabled, you can request a slide presentation in Google Slides format. I’ll keep it set to Pro mode, then click Enter. After your slide presentation is generated, you’ll have the option to click Export to Slides.
We can now access our slides directly in Google Slides, and the presentation is available in Google Slides where it can be fully edited. That’s it for now—see you in the next video!
Welcome back. Canvas enables you to transform a concept into an easily deployable application that’s tailored to your specific market or industry. The application development takes place within Canvas, and once created, you can distribute that application to other users. We’ll now proceed by clicking Enter using the Pro option.
Gemini delivers the completed app to the Canvas window. We then asked Gemini for guidance on how to deliver this to a client. In response, Gemini generates what it refers to as a standalone tool. After opening the standalone tool, we click on the code section, copy all of the code, and paste it into our preferred HTML editor. Once we save it in our HTML editor, we can click on it to launch and run it within a web browser.
That’s all for now—see you in the next video!
Welcome back. Gemini provides the ability to merge NotebookLM with a guided learning experience. If you already have notebooks linked to your account, you can select NotebookLM. From there, you can pick one of your existing notebooks and add it in the designated area. Next, you can activate the guided learning feature by clicking on Learn, which enables this guided learning component. You’re now viewing the guided learning interface.
Gemini then creates a structured learning pathway through your notebook content. Instead of navigating the notebook according to your own preferences, Gemini designs a learning sequence that it believes will optimize your information retention. Click Submit to proceed. Gemini will then examine your notebook, and you have the option to observe the reasoning process in this section or disable the thinking display.
Once ready, the guided learning experience is available for you to start. Each learning journey will be unique, and you’ll notice that Gemini provides you with space to work and presents guided questions for you to respond to. You may observe that Gemini indicates your uploads might be too substantial for optimal guided learning results.
Therefore, using a notebook could potentially overwhelm the system. Nevertheless, it doesn’t instruct us to halt, so we can continue through the entire guided learning experience using the notebook we’ve uploaded. You can upload any source material in this section to proceed through the guided learning process for comprehensive understanding. That’s all for now—see you in the next video!
Welcome back. Guided learning operates as a distinct learning methodology. Unlike other features within Google Gemini, it doesn’t consistently utilize the memory function, even when you’ve enabled it in your settings. By default, personal context is activated, which permits Gemini to reference your previous conversations to inform responses in your current session. However, this functionality doesn’t always operate within the guided learning framework.
Consequently, you may need to provide the AI with explicit directions to retain specific details about your background or prior conversations to ensure your answers are relevant. Therefore, when initiating the process, it’s advisable to request that Gemini customize the analogies to a particular element of your background that’s included in your memory profile.
We’ll enter that information here for the remainder of the guided learning experience. Gemini then responds by making the guided learning journey more personalized and poses a different question informed by that context. So when using the guided learning feature, you’ll want to ensure you provide the AI with contextual information based on what it knows about you.
That’s all for now—see you in the next video!
Welcome back. We’re going to conduct a guided learning session focused on a particular video. First, we’ll activate the guided learning feature. Next, we’ll input a YouTube video link. We’ll be using a structured prompt format, so we’ll insert our structured prompt, requesting a guided learning experience through the content of this video. Then we’ll click Submit. We’re not requesting a synopsis or a brief overview.
Essentially, we’re asking Gemini to lead us through the valuable aspects of this video. Gemini notes that it doesn’t recognize this particular element of our background, but it can still navigate us through the video’s content. In a guided learning session, you begin by responding to the AI’s questions. We’ll now click Enter. What Gemini is doing is creating learning segments for the user to work through, and the AI adapts to the user’s comprehension level.
The specific content to be learned was determined by the user. The context was also determined by the user. However, the AI controls the learning tempo and the instructional approach based on your responses. As you can observe here, the AI is confirming that you have sufficient understanding to progress to the next stage of learning.
We’ve selected a specific video, provided the AI with context, and the AI is guiding us through an educational journey. That’s all for now—see you in the next video!
Welcome back. One of Google Gemini’s most recognized features is its image generation tool, Imagen 3. While Imagen 3 is available across other platforms within the Google ecosystem, it’s predominantly utilized within the Google Gemini chat interface. This tool enables users to generate images based on particular context and create infographics tailored to specific requirements. We’ll input a prompt and then click Enter using the Pro version.
You’ll observe that Imagen 3 begins processing. Imagen 3 doesn’t always display its reasoning process, but you can view the thinking process here. When generating an infographic, you can examine some of the underlying assumptions that inform the infographic’s creation before the final output is produced by Imagen 3, and you’ll see the completed infographic appear here. This infographic can be downloaded from this location.
Sometimes you’ll notice a watermark in the lower right corner, while other times no watermark will appear. Imagen 3 allows you to access the Gemini chat and produce images within your specified context. You can also generate images that reference other images you’ve uploaded. For instance, we have an image here that we’re uploading from our collection within Google Photos.
We’ll now click Enter and allow the Imagen 3 output to be shaped by the images we’ve uploaded, and you’ll see an example of an image that’s been influenced by an uploaded image. That’s all for now—see you in the next video!
Welcome back. Once you’re familiar with the various features within Google Gemini, you can utilize them throughout different sections of the platform. For instance, we’re currently working within the guided learning experience. We’re going to request that the guided learning process create an infographic based on our current position, and we’ll activate Imagen 3 for this segment. We’ll click Enter, demonstrating that Imagen 3 can be integrated within the guided learning experience.
Upon your request, we’ll reactivate the guided learning process and ask it to proceed. We’ll now click Enter to return to the guided learning experience. We did respond to the previous question in the guided learning sequence, and Gemini indicated it would create a visual summary. However, that summary wasn’t provided initially. So we needed to go back and engage in some back-and-forth with the chatbot.
We then had to specifically request the visual summary. When we made that request for the visual summary, we enabled Imagen 3 in this section. We’ll now disable this feature, reactivate the guided learning process, and request that the guided learning experience continue. This demonstrates that we can employ Imagen 3 across various sections of the platform whenever we decide to.
That’s all for now—see you in the next video!
When you navigate to your settings section, you’ll find multiple tabs for managing your account. You can review your activity and decide whether to retain or remove it. Google Gemini provides you with authority over your data. In a previous video, we discussed that your personal context is enabled by default, which permits Gemini to draw from your previous conversations.
You have the option to switch this feature on or off. If you wish to provide custom instructions for Gemini, you can input them in this section. Gemini has certain integrated applications, which you’ll see listed in this area. If you’d like to enable your Google Workspace, you can activate it here. If you want YouTube Music included in your access and responses, you can enable YouTube Music.
You can access excerpts directly from licensed educational textbooks through OpenStax. Certain prompts will grant you access to this material, such as OpenStax or learn about economics—any of these prompts will help you reach OpenStax content. If you want an account that allows you to confirm whether particular media was created or produced with Google AI, you can activate SynthID, which will enable this verification. You can modify the visual theme from light to dark or vice versa, and you can view your public links in this section.
These are links you may have generated to share specific conversations with other people. In the following video, we’ll examine the remaining tabs, particularly scheduled actions. That’s all for now—see you in the next video!
Welcome back. In your settings section, you’ll find a tab labeled Scheduled Actions, which displays all the activities you’ve set up to occur automatically using the Gemini chat. You can also control your scheduled actions in this location. To create a scheduled action, you’ll need to communicate to Gemini that you want something to occur repeatedly, using natural language in your prompt.
We’re going to configure it so we receive a delivery on a particular day. We’ll also request one that we can preview to verify whether the scheduled action will produce what we’re looking for. We’ll then click Submit, and it appears we’ll need to request the image generation.
We’re going to revise this image, so we’ll ask for a modification, and the AI has complied with our request. We’ll now click Enter. We’ll return to our settings to check our scheduled actions, but it doesn’t show up in our Scheduled Actions menu. We’ll navigate back to the conversation. We discovered that we needed to disable the Imagen 3 engine to establish the schedule.
After we disabled Imagen 3, we were able to create the scheduled action successfully. We can now revisit our settings, and the scheduled action is now visible. That’s all for now—see you in the next video!
Lorem ipsum dolor sit amet, consectetur adipiscing elit. Ut elit tellus, luctus nec ullamcorper mattis, pulvinar dapibus leo.
Welcome back. In the left sidebar, you’ll notice an option near the top labeled Explore Gems. When you click Explore Gems, it will take you to this platform section. We’ll close the sidebar. You’ll observe two distinct sections within the Gems area: the Gem Manager and Gems created by Google Labs. At the time of recording this video, you’ll also discover that Gems now enable you to develop AI applications directly within your Gems section.
You can browse the Gems developed by Google Labs. A Gem is a customized method of engaging with Google Gemini. For instance, you’ll find an element called Recipe Genie, which is an application built with Google Gemini through the Gems system, and it demonstrates how Gems function. You can click the start button, and this Gem requests ingredients. We’ll now click Enter for this particular Gem.
This Gem generates a web application that demonstrates what you can prepare with those ingredients. This represents just one approach to utilizing a Gem created with the Gemini engine. What you should do is explore the Google Labs Gems to gather inspiration for the types of Gems you might want to develop for personal or professional purposes.
That’s all for now—see you in the next video!
Welcome back. Beyond the app Gem, the Gem Manager also contains Gems that Google has developed. These are ready-made Gems designed so that after you try them, you can decide what type of Gem you might want to build for a recurring task or direct prompt engagement with Google Gemini. For instance, there’s a feature called the Brainstormer, and the purpose of this Gemini Gem is to help you generate specific ideas through brainstorming.
In this instance, we’ll use the Brainstormer and request brainstorming suggestions within this feature. Keep in mind that Gems may not access your specific memory, so you might need to supply context when using them. This is something to remember when developing a Gem. We’re responding to the AI’s prompts so it can deliver brainstorming concepts to us.
This particular Gem does offer concrete, actionable suggestions without tapping into the portion of Gemini’s knowledge base that accesses your context from your personal information. That’s all for now—see you in the next video!
Welcome back. Whether you decide to build an app or a standard Gem, you can develop your own Gem using the creation wizard. You can click on New Gem and assign your Gem a name. If your Gem needs a knowledge foundation, you’ll upload that information in this section. You have the option to upload a NotebookLM notebook or individual files. We’re going to upload NotebookLM notebooks.
We’ll then click Add, and our knowledge foundation is now established. We can select a default tool for our Gem—we’ll choose the Guided Learning tool. After doing that, we can save our Gem, and it’s now been saved. We can initiate a chat to interact with our Gem and test our optimizer.
You should observe that the Gem you’ve created starts functioning according to your specifications. If you return to your Gem Manager, you’ll notice the Gem has a sharing option. We can click Share. You’ll need to test your Gem to confirm whether it’s shareable. In certain situations, when you’ve uploaded content like NotebookLM notebooks, your Gem might not be shareable.
However, if you’ve simply completed the wizard and relied on Gemini’s knowledge base, your Gem will typically be shareable, and you can distribute it to others by copying the link and granting them access to the Gem. That’s all for now—see you in the next video!
In conclusion, every Gem you develop can be modified. We’re going to edit this Gem by removing the knowledge base to see if that makes our Gem shareable. As an alternative, we’ll upload specific documents. We’ll now update our Gem to test whether this change will enable sharing functionality. Our Gem is now finalized.
We’ll return to the main page displaying all Gems, navigate back to the Gem Manager, and attempt to share the Gem we just modified. Our Gem has been successfully updated, and we can now share it because we’ve edited it and uploaded PDF files rather than using NotebookLM notebooks. That’s all for now—see you either in another video or in another course!
FAQ’s
1. What is Google Gemini and who is this course for? Google Gemini is Google’s advanced AI platform that offers text generation, image creation, video production, and more. This course is designed for content creators, educators, marketers, business professionals, and anyone looking to master AI tools for productivity, creativity, and workflow automation.
2. Do I need a paid Gemini subscription to follow along? While many features are available with a free Gemini account, some advanced features like Pro mode, extended Deep Research, and increased video generation limits require a paid subscription. The course covers both free and premium features, clearly indicating which require a subscription.
3. What’s the difference between Fast, Pro, and Thinking modes in Gemini? Fast mode provides quick responses, Pro mode offers more detailed and higher-quality outputs but with usage limits, and Thinking mode shows you the AI’s reasoning process step-by-step. Each mode serves different purposes depending on your task complexity and need for transparency.
4. Can I share the Gems I create with my team or clients? Yes, most Gems can be shared via a link, allowing others to use your custom AI assistants. However, Gems that include uploaded NotebookLM notebooks may have sharing restrictions. Gems built solely with Gemini’s knowledge base are typically fully shareable.
5. How does NotebookLM integration with Gemini work? You can attach your NotebookLM notebooks directly to Gemini chats, allowing the AI to access your organized sources and notes. However, Gemini only sees the metadata and sources—not your chat history within NotebookLM. This integration combines your curated knowledge with Gemini’s broader AI capabilities.
6. What file types can I upload and work with in Gemini? Gemini supports various file formats including PDFs, Word documents, images (JPG, PNG), spreadsheets, presentations, and can even process YouTube videos via links. You can also connect Google Drive, Gmail, and other Google Workspace tools for seamless file access.
7. How many videos can I create per day with Gemini’s VEO feature? Typically, you can create between 3-5 videos per day with your Gemini account, though this may vary based on your subscription level. For additional video creation, you can use related Google tools like Google Vids, which operate on a separate credit system.
8. What are Canvas and Dynamic View, and how do they differ? Canvas is a tool for manipulating files and formats—you can convert documents to presentations, create applications, and export to Google Workspace. Dynamic View creates interactive, app-like images that users can engage with directly in the browser. Canvas focuses on document transformation, while Dynamic View emphasizes interactive visual experiences.